Monatliche Archive: April 2023

2 Beiträge

BMS für die Carbocab-Batterie

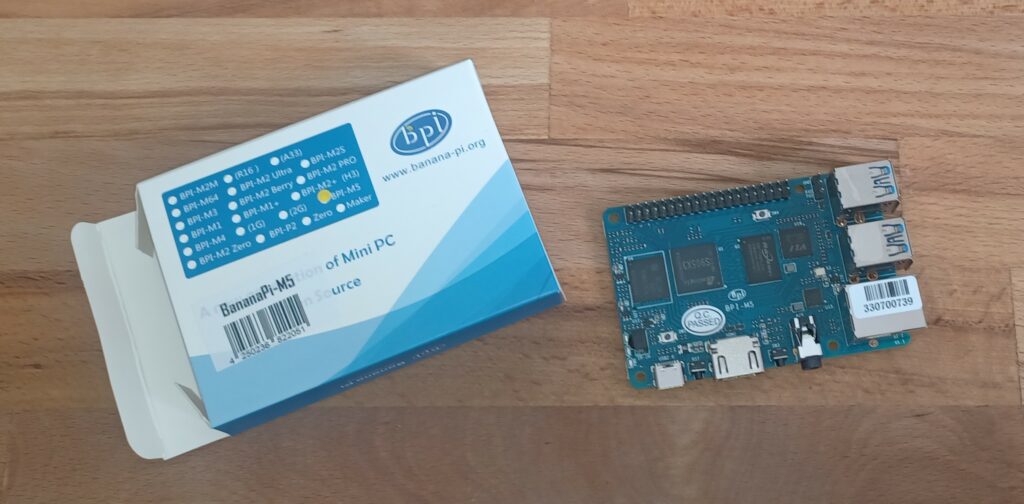
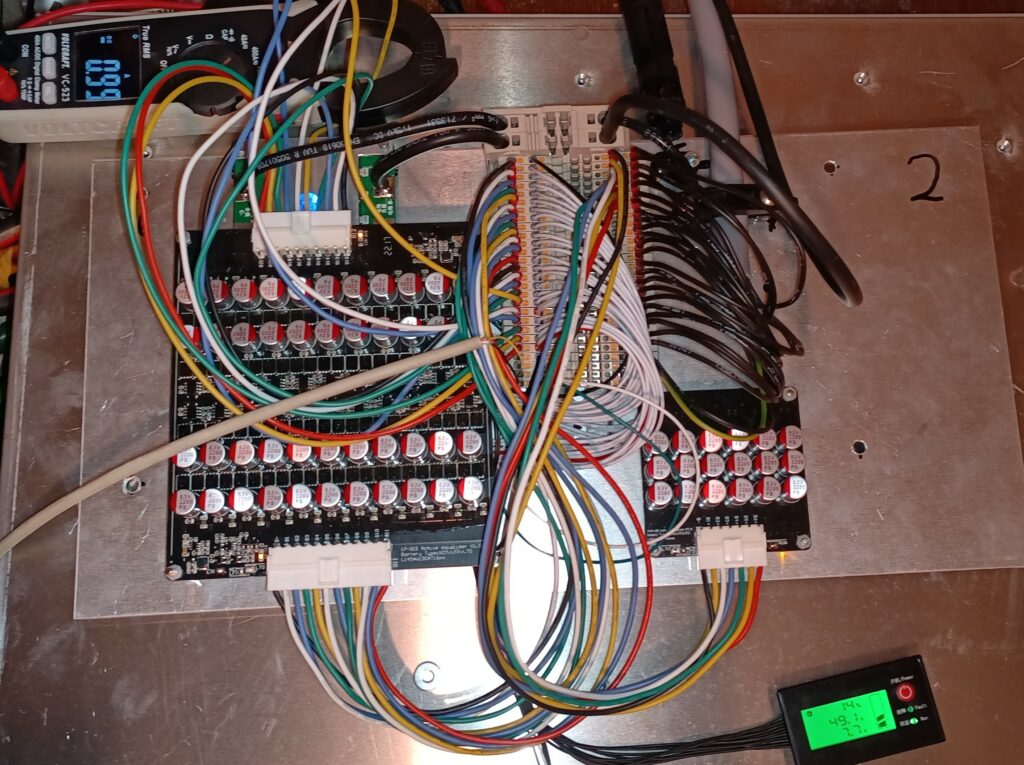
So, am Freitag kam die Lieferung des BMS für meine LTO-Stacks, das ich gestern abend in Betrieb nahm und überraschend feststellt, dass eine Zelle schon wieder 170mV Abweichung hat – obwohl die Batterie lange am Balancer hing und voll gehalten wurde, bevor sie nun etwa 20h nicht angeschlossen war. Naja, BMS (ein Heltec 9-25S 100A, das wohl eigentlich von YanYang ist) eingebaut und per Bluetooth an die – aus ominöser Quelle per apk installierte Android App – geklemmt. Einstellungen wie Zelltyp, Batteriekapazität, Zellanzahl etc. alles kein großes Problem und wupps, schon sieht es gut aus. Kurzerhand die verbliebenen 3 Batterien in Originalzustand auf die (nahezu) gleiche Spannung gebracht und angeschlossen.

Entladen über die Nach schien ganz ok, auch wenn der SOC (=State of Charge) am morgen etwas gering aussah am BMS. Tagsüber laden ging auch…

…bis das BMS meinte abschalten zu müssen. Als runter in die Garage und schauen: diesmal 200mV Abweichung von Zelle 18 nach oben und das BMS hat offensichtlich aufgrund der Zellüberspannung abgeschaltet. Braves Ding, tut was es soll – schade nur, dass offensichtlich min. eine Zelle dieser Batterie ausgetauscht werden muss. Eigentlich sollte ich natürlich die Kapazität und den Innenwiderstand jeder einzelnen Zelle prüfen, aber dazu will ich mir jetzt nicht noch mehr Equipment kaufen. Ich lass erstmal die Indikation über das BMS reichen.

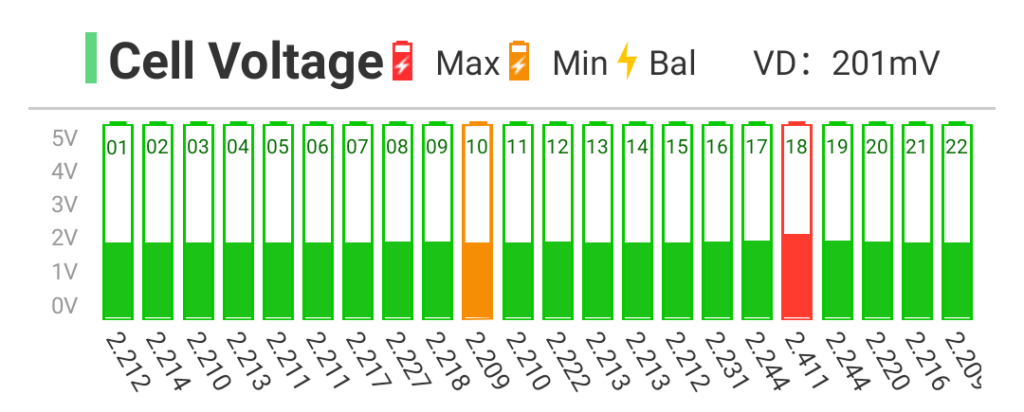
Das Bild wohlgemerkt ist etwa 30-60 min. nachdem das BMS den Ladevorgang abgeschaltet hat und der Balancer noch fleißig war – muss wohl 3 Sek. über 2.7V gewesen sein.

VenusOS on BananaPI

During my journey to fix the Greenrock Carbocap Batteries I don’t want to directly mess with the VenusOS installed on the „Greenrock Controller“, so I wanna install a fresh device from the RaspberryPI images but… I only have a BananaPI BPI-M5 at hand, so let me see if I can get it running on that:

Successfully unboxed the BananaPi-M5

Downloaded image from here: https://wiki.banana-pi.org/Banana_Pi_BPI-M5 and installed the BPi-tools and wrote the image to an microSD card:

$ apt-get install pv
$ curl -sL https://github.com/BPI-SINOVOIP/bpi-tools/raw/master/bpi-tools | sudo -E bash
$ sudo bpi-copy xxx-bpi-m5-xxx.img.zip /dev/sdX

For more details see the docs. After ejecting the SDCard from the PC booting the BananaPI from it, and move the image to the EMMC, after login in to the BananaPi

$ apt-get install pv unzip
$ unzip -p xxx-bpi-m5-xxx.img.zip | pv | dd of=/dev/mmcblk0 bs=10M status=noxfer

And now add the Victron packages as documented

OK, I give up. The achritecture used by the BananaPi is not supported and I failed to do it in a multi-arch way – was some ARM 32 vs 63 bit issue, but it was not worth the effort, so I went bach to the beaglebone, that anyhow comes with the Greenrock. Tata, booting from the SDCard and adjusting the root password makes is easy going. Just take care about the right partition – the backup rootfs from the last firmware upgrade is still around.

Being root makes it easy to unlock the VRM remote console and we are free to configure what we want.